Quilting an Embroidered quilt

Borders are on - now HOW TO QUILT IT?
My “Never ending’ covid quilt progress continues to move forward - and I have been both frustrated and encouraged by the process. In the photo above, you can see that the borders are on, and that I have given it a bit of personality here. Although there is a lot of a traditional Christmas color scheme in this pattern, there’s also more non tradiitional colors as well - there’s orange in every block with a snowman. - and I wanted to bring that out a bit more. I have never been a huge fan of pieced borders, but this treatment was much easier than I thought it would be. Credit to Donna Jordan of Jordan Fabrics for both the inspiration and the tutorial for the border here.
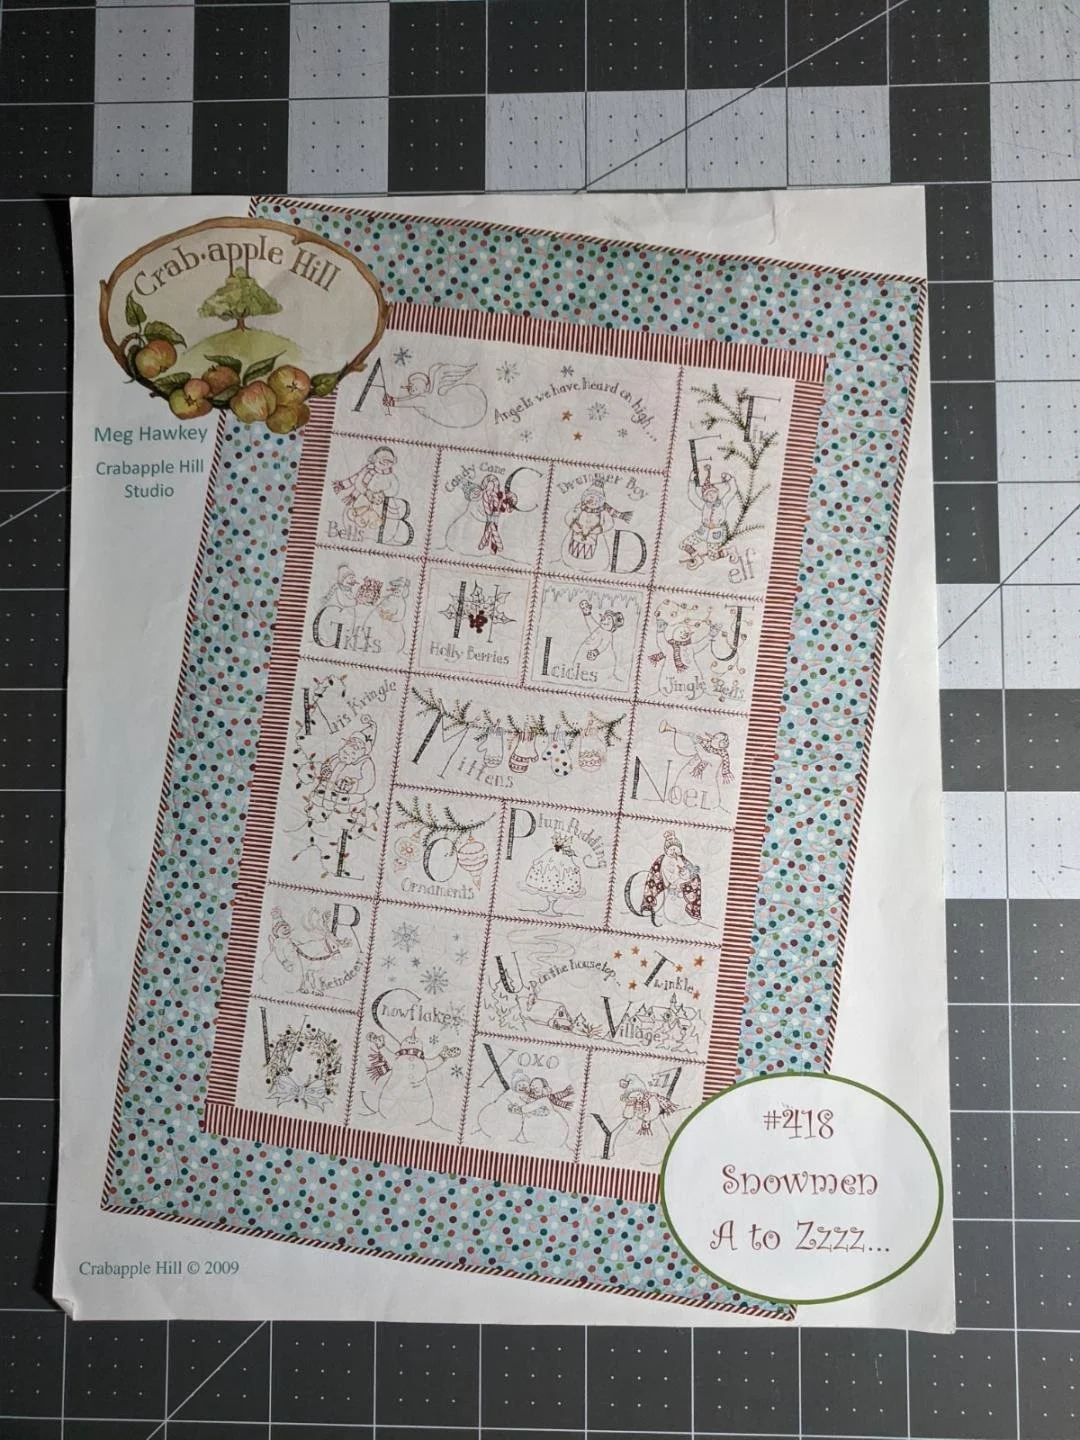
The pattern is called Snowman A to Z, and it’s a pattern designed by Crabapple Hill Studio.
I am not adding the red feather stitches to separate the blocks. - that’s a design choice born from an error in cutting.
Read on for more details.
When I cut the original double layers of muslin out, I thought they were oversized - turns out, not really. The blocks on this piece interlock, and because of that, it became necessary for me to add fillers to make the quilt balance. If I’d added the feather stitching, it would have made that much more obvious - so I am eliminating that step altogether.
I will be doing the quilting myself on my Janome 8900, and that decision has had everything to do with how I am going to quilt this. I want the quilting on this to take on the role of an ehancement to the embroidery - not to overwhelm it.
This is going to be a challenge - but I’ve got a clear vision of where I want to go with it. This one isn’t going to be quilted to death, but more quilted to life.
The size is a bit daunting, and I decided to both spray baste and to pin this quilt before I begin the quilting. It’s a big quilt (for me), and there’ll be a lot of movement under the needle. It took a LOT of pins - a step I’m not really used to, but now that it’s done, a step well worth taking.

There are a LOT of pins there - but well worth the time to do this.
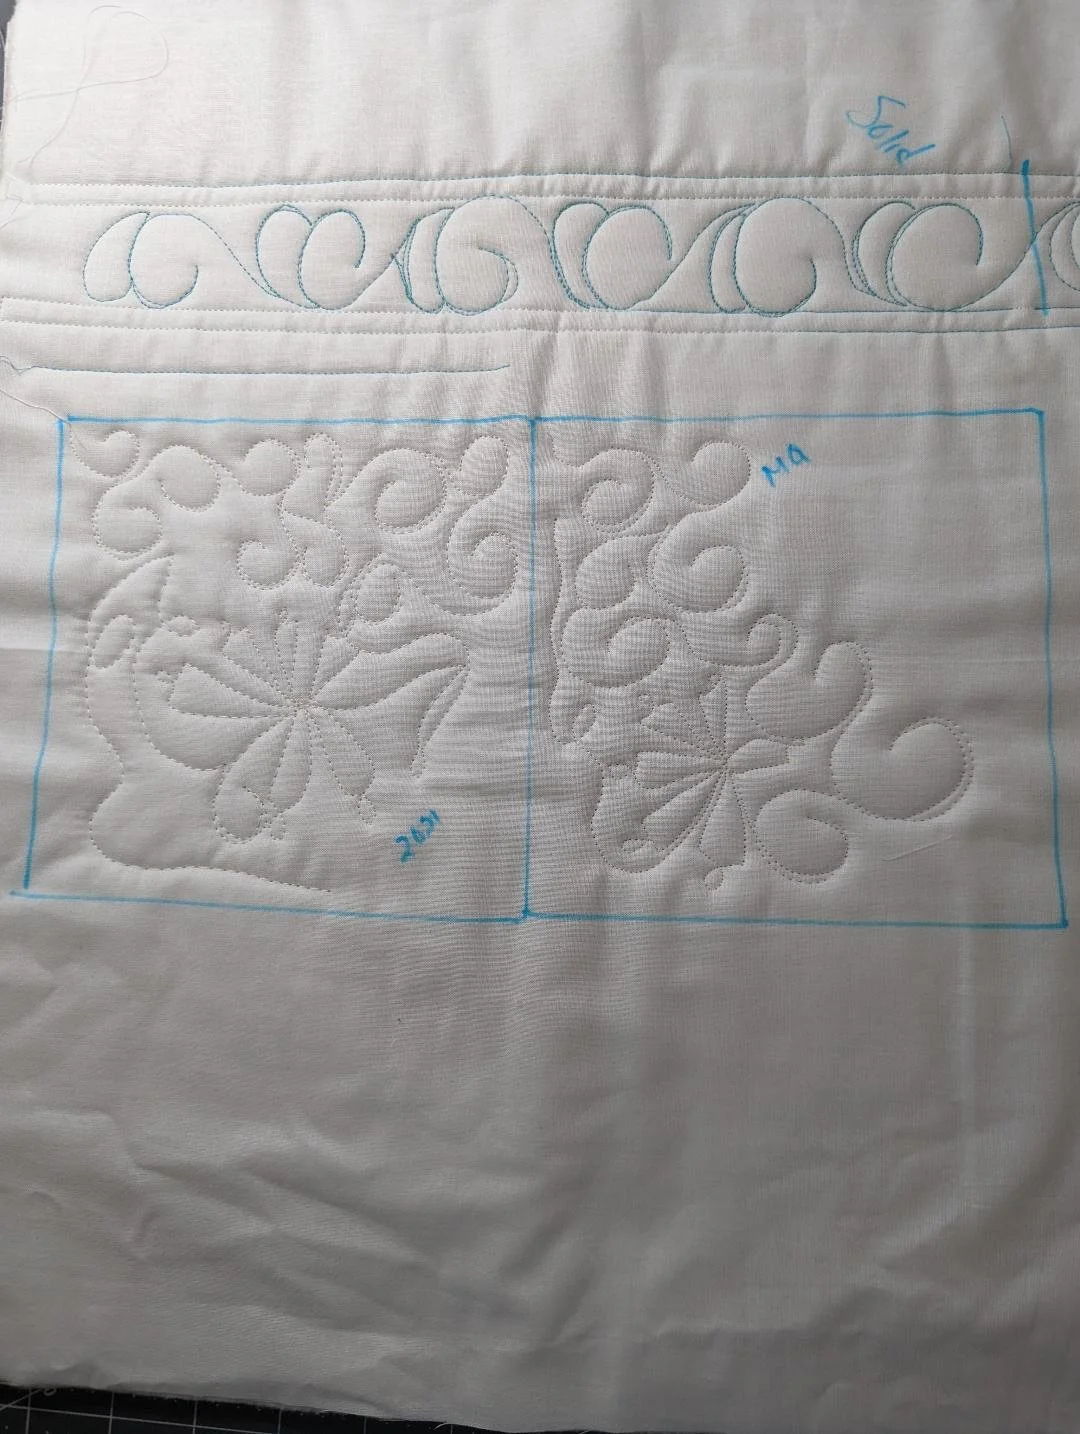
The next step was to make an oversized quilt sandwich that is an exact duplicate of the materials used in the quilt. I emphasize exact dupe because I want to use this as I’m quilting to help me troubleshoot issues which arise, and make design choices.
Once I outline stitch all the embroidery down, I’ve settled on an all over design for the rest of the quilt - consistent loops an swirls amongst the color, with an occasional snowflake tossed in for fun.
One of the concerns I had when I tested this out was whether the design would show any ‘eyelashing’ - it doesn’t.
Thread tension was another concern, since I’ll be using one color on the top and another on the bottom.
Marking the top with small registration marks is easy with my Mark-b-gone marker, which really does come out with a bit of water. I try to mark lightly, but it works really well.
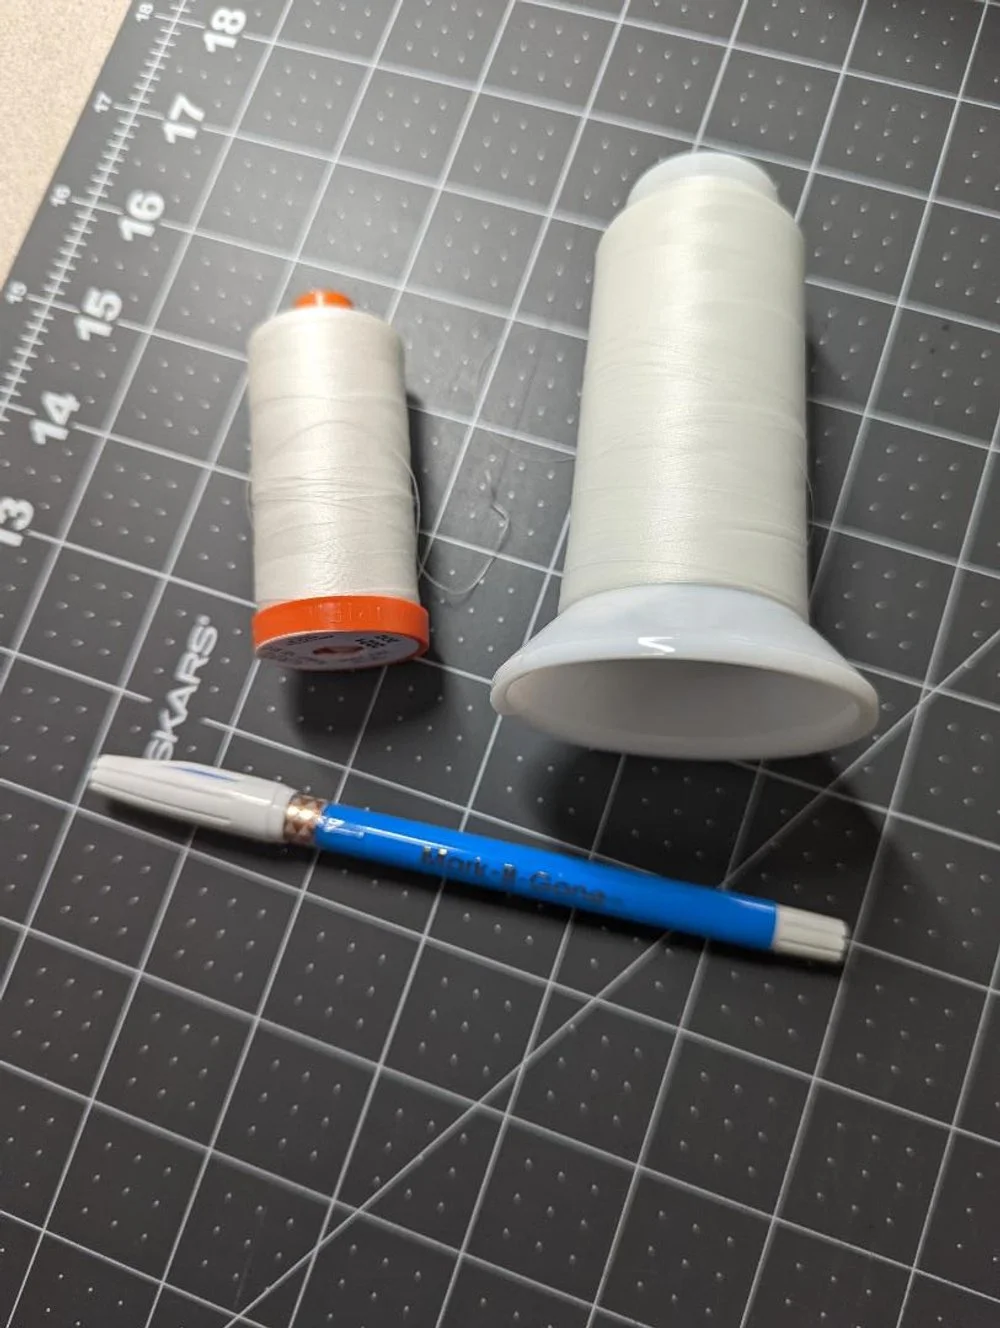
Thread choice - Aurifil or Superior? They look the same, but…
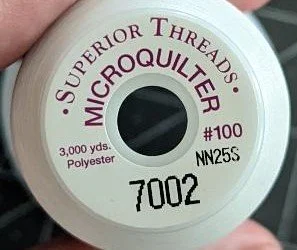
Now we come to thread selection. I had two to pick from - my ‘go to’ Aurifil 50 weight, and a spool of Microquilter, a 100 weight thread from Superior I had picked up earlier this year. I tried Aurifil, and got the results I was expecting - easy, consistent results. Just for giggles, I tried the Microquilter - and I was amazed at the performance. There was much less drag on the quilt as I looked my way through the stitch pattern - you can see above that the Aurifil is on the left, and Microquilter is on the right.
If I hadn’t done this exercise, I would never have realized the difference. Quilting with the Microquilter will make this experience so much easier.
A new thread to play with.
Stay tuned for more updates!